This is the time of year when many folks who don't have heated greenhouses (including us) are trying hard to eke out the last garden-fresh veggies of the year. With the frost frequency increasing to 'almost daily', some type of cover over the garden is necessary to keep the crops from becoming a nice sparkly ice sculpture in the early morning but transforming to a mushy puddle of chlorophyll by the afternoon. So, we built a row cover. We know, we know. So what? Thousands of people have made row covers in the past. What's special about ours?
As chance would have it, in addition to a garden we want to protect at night, we have a batch of meat chickens we are trying to get on protected pasture during the day. (We've still been bringing them into the garage at night.) Since they don't need protection at the same time, we thought we might be able to build something that would serve both purposes. So our row cover doubles as a chicken tractor. It's not glamorous, but it is effective, and it has a few features we haven't seen on other row covers or chicken tractors. So, here's how we made it:
 |
| We started by building a frame out of 2 x 4's (10 feet long and 4 feet wide), and cutting two pieces of 3/4" electrical conduit to 6.5 feet long. If we manage to bend them into a perfect arc, that should give us a two-foot-high hoop at the center of the row cover. One of four-foot pieces goes three inches in from the end. |
 |
| We got the hoops kind of the right shape, but not perfect, just by eye and the conduit bender tool you see laying in the frame. If we wanted to be more precise about it, we could have done something like make a mark every 3" and bend it 6° at the mark, or built a jig. Marking the conduit would have helped keep the pieces in the coplanar, but our approximation will work for our purposes. |
 |
| Next, we're going to cut the fence. We sized it by holding it alongside the hoop and then cutting along the line where the foot is. We went with the welded wire fence. It's not quite as predator proof as hardware cloth, but it's a lot cheaper. It should keep the chickens safe from daytime predators like dogs and hawks. Remember, the chickens go inside at night so the hoop house can protect the garden from frost! |
 |
| Hey, this is kind of coming together! The wire fence pieces add a fair amount if rigidity themselves, so if we get some snow, the plastic sheeting that's going to go over the top will have a harder time falling down and crushing our plants. |
 |
| Now we need to add a few features to make it more functional as a day-only chicken tractor. The first is a panel that will slide along the inside to herd the chickens toward one end. Maybe your chickens are different, but our chickens don't like being picked up very much, so when we go to move them, they run to the far end of whatever structure they're in. Crawling through a two-foot high wire hoop over muddy, chicken poop-covered ground isn't Katie's idea of a good time, but maybe it could be a new obstacle in the Tough Mudder. For now, we'll add a sliding panel, which means we need something for the panel to slide along. We decided to put rails of electrical conduit between the two end hoops for the panel to slide along, and we needed a way to secure them to the hoops. The punch-out 90° elbows work ok, but we had to drill out one side to get the hoop to pass through. It would have been much easier with a 15/16" or 1" drill bit, but we made it work with this step bit. It's not glamorous, but it got the job done. We found out that holding the elbow piece in a vice or vice grips helps to avoid tearing up our hands when the drill bit catches hard. We did four elbows (two for each end hoop). |
 |
| Next we put the elbows on their hoops, punched holes in the conduit, drilled them out, and screwed them to the frame. Since we were working on an uneven surface, we had to be extra careful about keeping the bottom of the conduit flush with the bottom of the boards. |
 |
| It's not a great shot, but this shows the hoops and the straight pieces running between them. The piece hanging in the middle is the backbone of the chicken-herding panel. It's a piece of 2 x 4 roughly 36" long with a conduit hook on each end so it can slide along the straight pieces. We'll add a piece of the fencing to it later on. Below is a close-up of the sliding mechanism. |
 |
| This is a close-up of the sliding mechanism promised above. The idea with the sliding panel is that we can push on the board (with attached fencing) from one end with a long stick and chase all the chickens to the end with the door to bring them in for the night. Then we can push on the board from the other end and give them the space back the next morning. |
 |
| On the end with the frame's cross-piece set inward a few inches, we added another piece of 2 x 4 to serve as a door so we can let the chickens in and out, and put their food and water in and out. We bent another piece of conduit for the upper part of the door frame. So if you're counting, we're at two ten-foot 2 x 4s, two eight-foot 2 x 4s, and five ten-foot 3/4" pieces of electrical conduit. Plus two 6.5-foot sections of five-foot tall woven wire fence, a hinge, and some screws. |
 |
| For the ends (the door piece here), we cut two-foot sections of the fencing and attached it to the board... |
 |
| ...then trimmed it a little larger than the hoop and bent the extra wire around it, making sure that the pointy ends don't face outward. Somewhere along here we've also attached the wire pieces going over the hoops to the board frame. Same for the chicken-herding panel, but at about 0.8 scale. |
 |
| We made a little latch to keep the door shut. It's two screws and a piece of wire we trimmed from the fencing. |
 |
| Then we added a plastic layer over the top. It's a 6-mil (0.006") polyethylene drop cloth, 10' x 25'. That's convenient because 10' is just the length of our row cover! Wonder if we planned it that way... |
 |
| We attached it to the rest of the hoop by folding over the end, adding grommets (also our favorite word in the English language), screwing in one side, pulling taut, and screwing in the other side. If we placed our grommets wisely, we should be able to fold back part of the plastic to uncover a quarter, or a half, etc. That should help keep the temperature down for the chickens if it's sunny and warm during the day. We're not sure how long the grommets will last, but we'll update the post if they tear through quickly. |
 |
| Looks like it's ready to keep the frost off our kale! Too bad not much else is thriving in our late-planted fall garden. We're just making it easier to have next year be better than this year! We haven't figured out an aesthetically-pleasing way to do the ends just yet. A little bit of internet research suggests that most other folks haven't either. We didn't want to take a lot of excess plastic and bunch it up. Maybe we'll do something with reclaimed boards after a while. For now, we'll drape a couple tarps over the ends at night if it's going to be below 25 °F or so. Not aesthetically-pleasing, but it'll be dark outside, and we'll be out at dawn and dusk anyway to transfer chickens. We'll keep working on it and update this post when we figure something out. |
 |
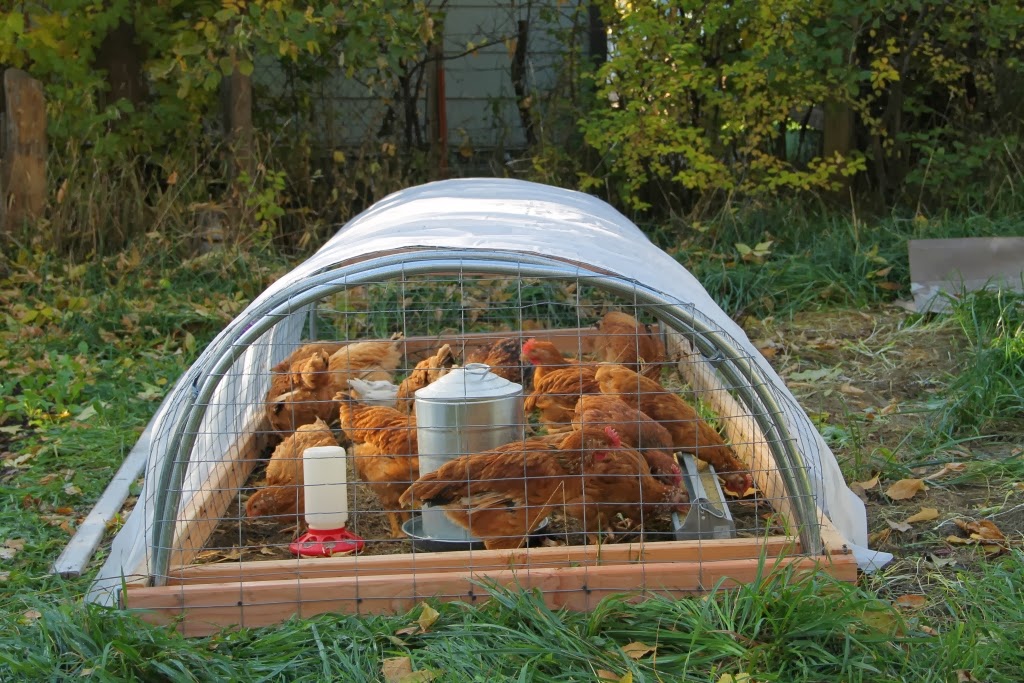
| And here it is with chickens! They're busy getting next spring's garden expansion ready. Heck, we might need to make a second one this fall if the chickens get any bigger! |
Have you built any dual-purpose row covers? Do you have any good ideas for how to do the ends? Let us know in the comments section below!


No comments:
Post a Comment